It’s beneficial to periodically reflect on what sets your operation apart from the competition. Is it your long-standing industry reputation, exceptional customer service, or competitive pricing? These are significant differentiators, but there’s a fundamental aspect you might be missing that can enhance your financial success: the field adhesion test.
Leveraging the Field Adhesion Test
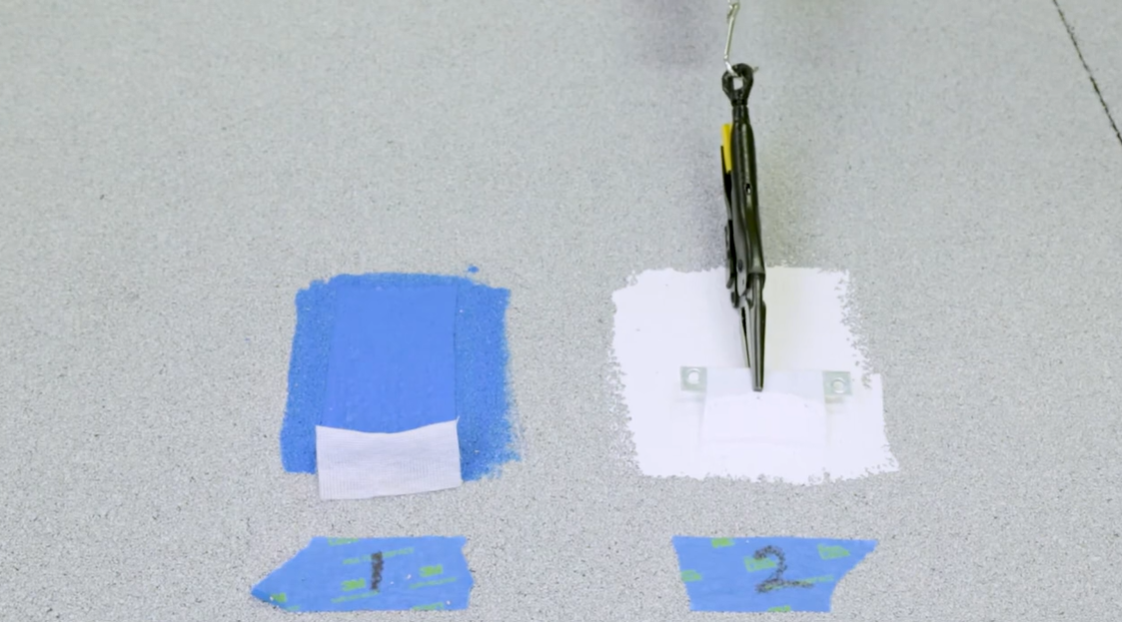
A field adhesion test confirms product compatibility and ensures the application conditions are right for a successful project. Beyond its practicality, it can serve as a powerful sales tool. Your customers, whether they’re owners or contractors, depend on your technical expertise for making informed roofing or waterproofing decisions.
The adage “knowledge is power” holds true here. The more relevant insights you provide, the easier it is for customers to make decisions. Take ASTM D4541, for example. This critical test is included in all our specifications for liquid-applied coatings. To perform this test, you’ll need the following tools:
- Luggage or fish scale
- Small “vice grip” style pliers
- Metal bracket
- Construction knife
- Fabric scissors
- 6” wide polyester fabric
Conducting the Field Adhesion Test
Preparation Steps
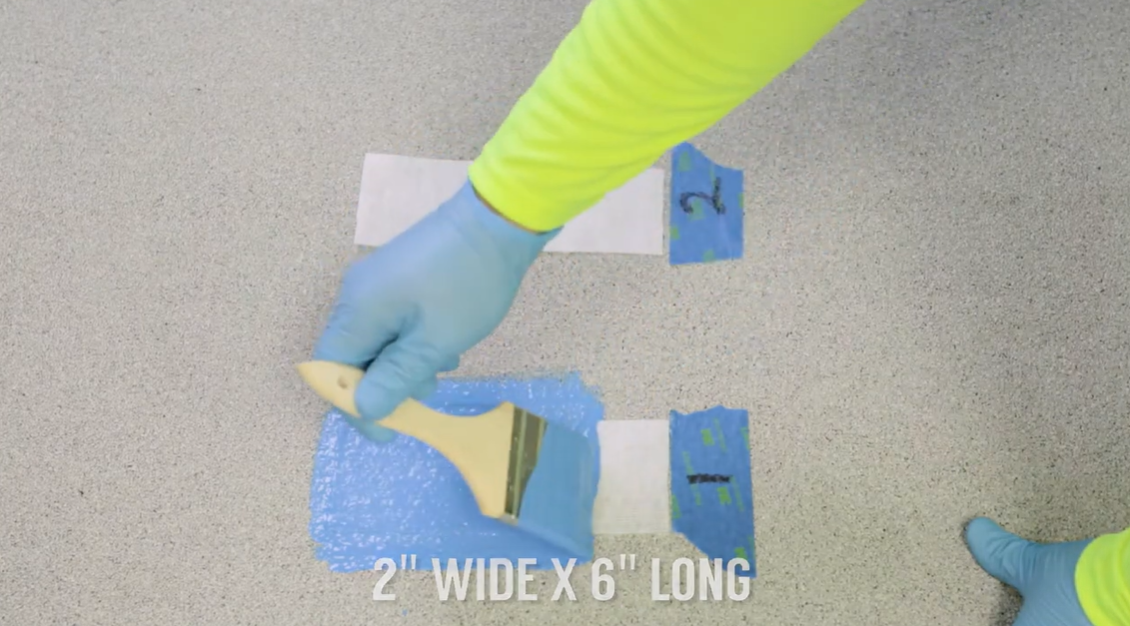
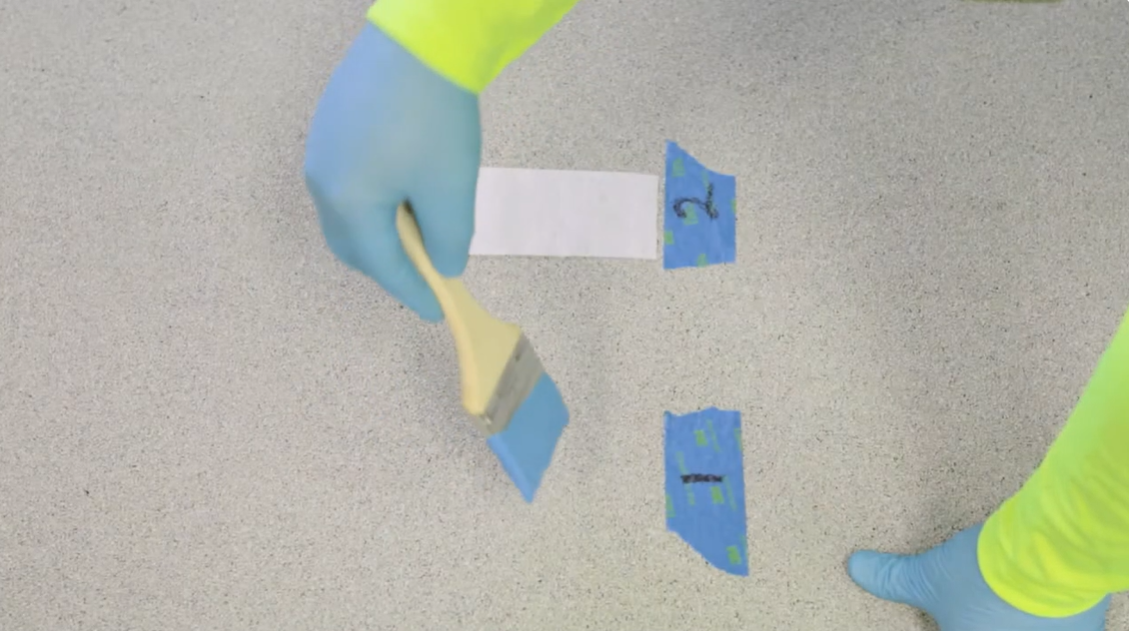
Before starting the test, gather your tools, determine the primer and coating best for the application, and clean the designated test surface. Apply Polyglass primer ensuring it dries properly. Then, apply the desired coating onto the substrate. The coating strip should be approximately 2 inches wide and 6 inches long. Apply a second coat to thoroughly saturate the fabric, leaving two inches uncoated for removal after curing. Allow at least 24 hours of drying time before pulling the fabric strip.
Make sure to clean and test 4-6 distinct areas. This strategy ensures a comprehensive assessment of the roof’s condition.
Interpreting Test Results
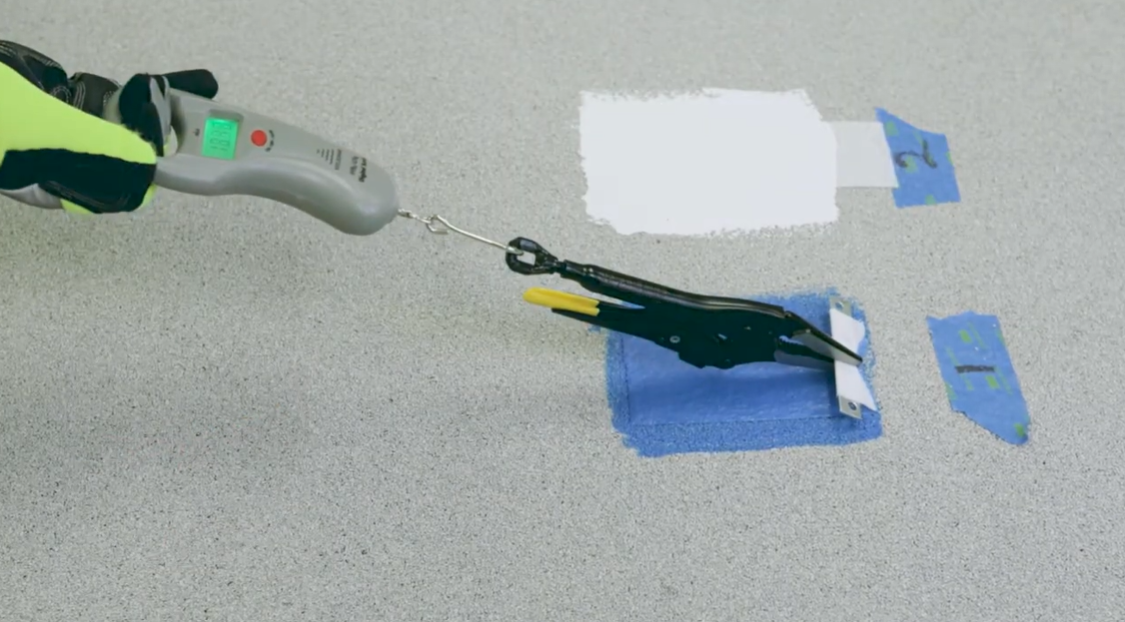
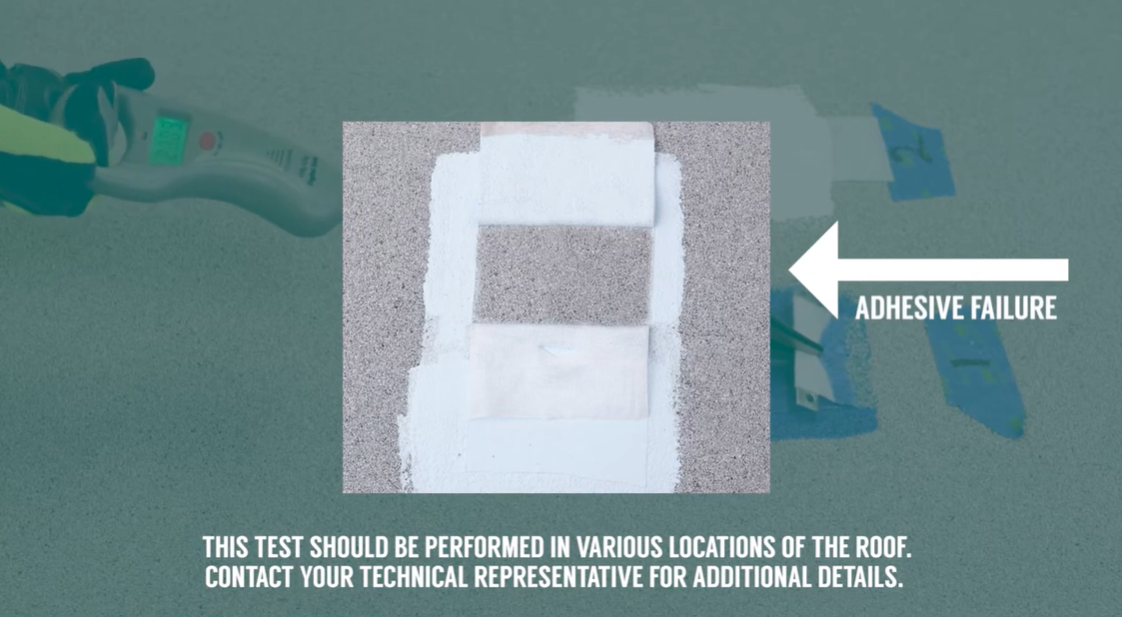
If the coating detaches from the substrate cleanly, it indicates adhesive failure, suggesting that additional primer may be needed. If the coating remains on the surface, the primer might not be required. For optimal results, we generally recommend using primer, but it’s best to consult Polyglass technical services for tailored guidance.
Establishing Credibility
As an expert, sharing test results can help establish and maintain your credibility. Firsthand knowledge is easier to convey to colleagues and supervisors. If your customer can’t access the test area, consider documenting the test steps and results with photos or videos. An iPhone mini tripod can help you capture the pull test on video, which you can then email to the customer.
Demonstration Samples
Another effective strategy is to create an adhesion test sample for meetings and trade shows, using PolyBrite 745 primer and PolyBrite 70 coating.
PolyBrite 745 is a low-VOC, stain-blocking acrylic primer designed to enhance the adhesion of acrylic roof coatings to various substrates. Its thin solution penetrates pores and dries quickly.
PolyBrite 70 is a premium 100% acrylic, water-based elastomeric coating that cures into a seamless membrane. It lowers roof temperatures, extends the lifespan of both new and existing roof systems, and offers protection from ultraviolet sunlight and other weather elements.
Allowing customers to pull on the fabric themselves reinforces the test’s findings and demonstrates the effectiveness of the products.
Final Thoughts
Don’t be afraid to say no when the situation arises. Not all roofs are suitable for a roof coating application. Remember that you can offer customers a wide variety of re-roofing options that include insulation, decking, and other building envelope materials. A consultative sales approach can ensure the best outcome for both parties.
To browse our range of roof coatings or for more information on the proper Polyglass roof coatings installation process, contact your Polyglass technical services representative.